Gift with Cart Value
Learn how to set up a Gift with Cart Value campaign to give your customers more appealing rewards by following this guide.
Gift with Cart Value campaign is designed to encourage customers to spend more by offering them a free gift once their cart reaches a specific value. This strategy helps increase the store's average order value while also motivating upselling and improving conversion rates. Additionally, by rewarding customers with free gifts, it enhances their shopping experience and builds stronger customer satisfaction and loyalty.
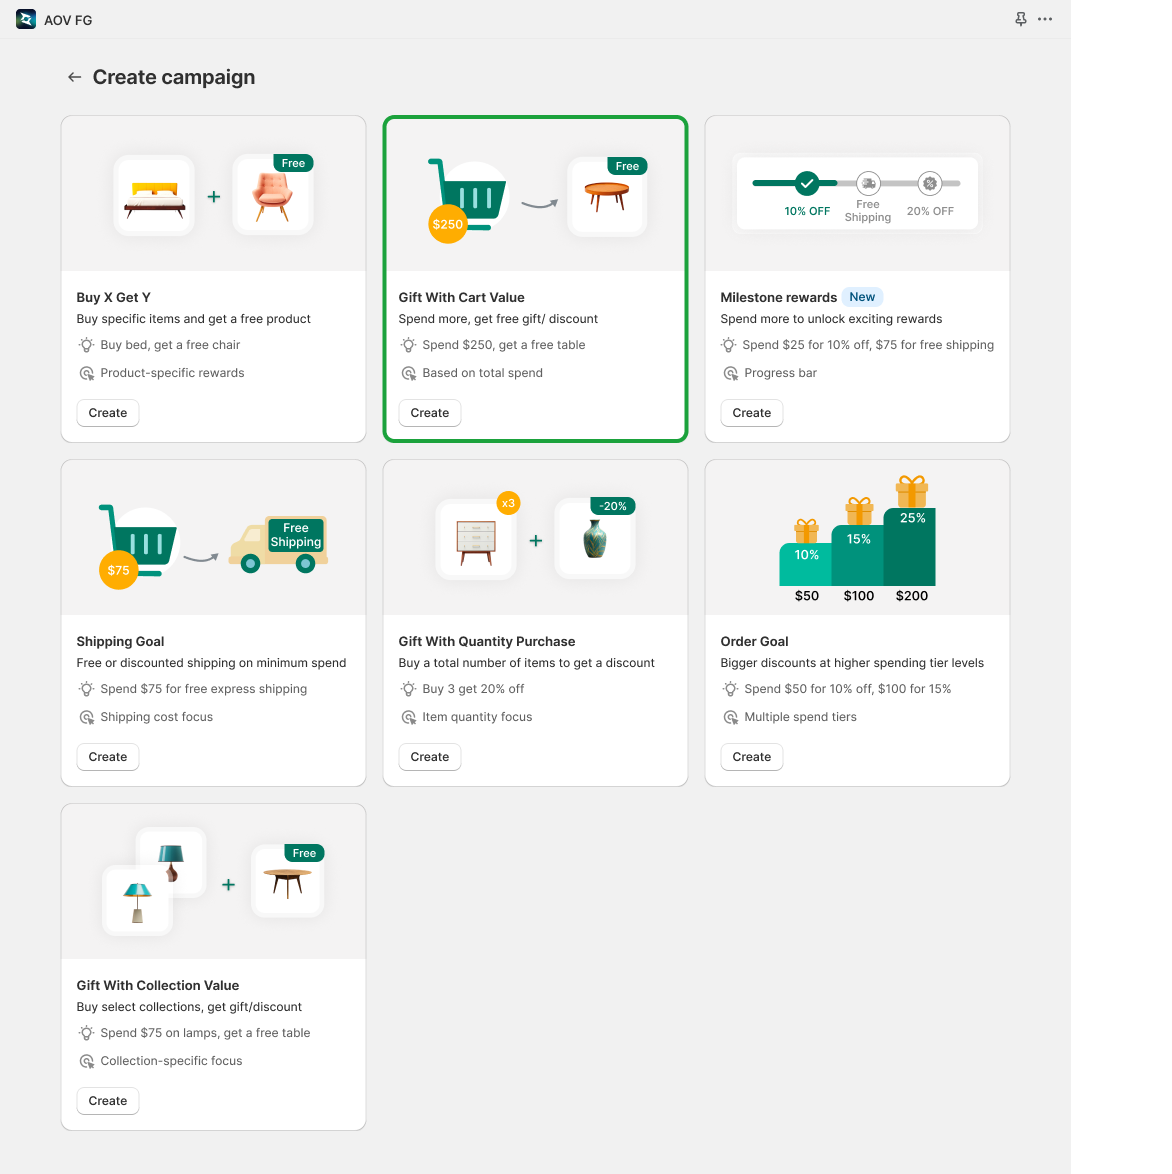
How to set up Gift with Cart Value campaign?
Step 1: Access gift with cart value
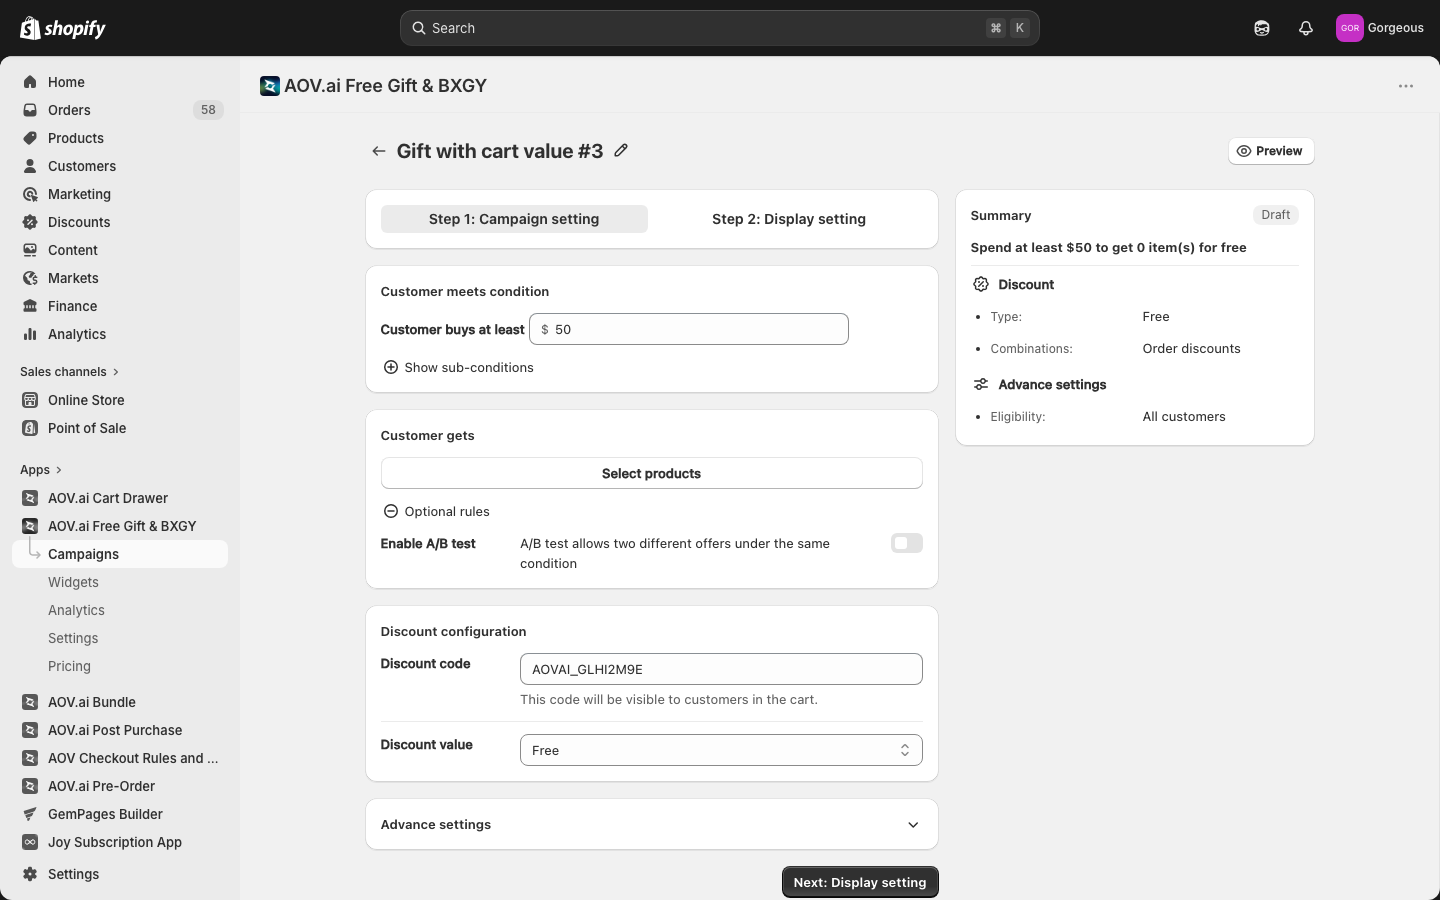
From your app, go to Campaigns > Gift with Cart Value to access the campaign, in which you will find a default Campaign name that we created. You are able to change the name to your liking, it is used for you to identify this campaign with others.
Step 2: Set up campaign conditions
Trigger condition

- Customer buys at least: Set the minimum cart value customers need to reach to qualify for the gift.
You can expand Sub-conditions to further refine when the offer applies:
- Exclude product/collection: Choose specific products or collections to exclude from this promotion. The excluded items will not count toward the minimum cart value.
- Include product: The gift only applies when the customer has a specific product variant in their cart. Use this to target the offer to customers buying a particular item.
Step 3: Set up campaign gift
3.1 Gift selection
- Select the gift(s) you want to grant your customers. For instance, you might offer a complimentary gift like a microfibre cloth if customers buy a pair of glasses.
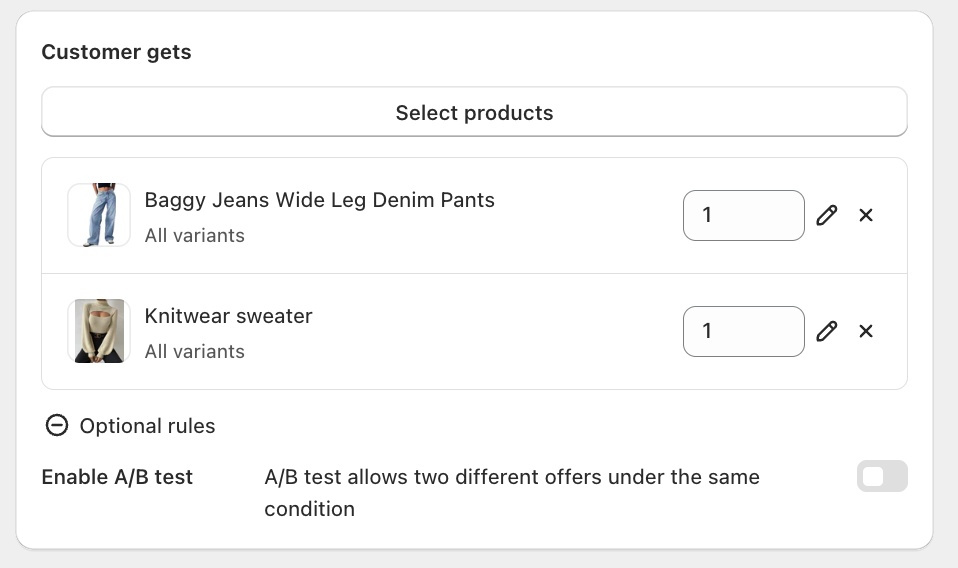
- You can change the quantity of the gift that customers will receive. Merchants utilize this feature to not only boost customers' spending, but also to clear out remaining old items.
- If the gift has multiple variants, you can choose which one you want to offer or leave the decision to customers.
3.2 A/B Testing (optional)
Enable A/B Testing to randomly offer 2 types of gifts to customers. Doing so will help you understand what customers want and create the best offer to boost revenue.

Step 4: Configure discount
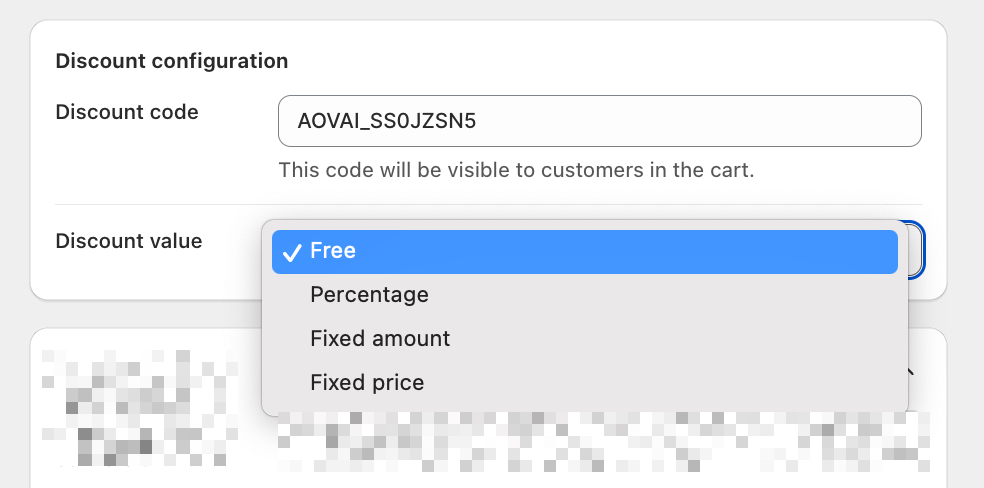
The system auto-applies a discount code to your gift. You can edit the code as you like, it will be visible to customers in the cart.
Choose the Discount value type to apply to the gift:
- Free: The gift is given at no cost to the customer.
- Percentage: Apply a percentage discount off the gift's original price.
- Fixed amount: Reduce the gift price by a fixed dollar amount.
- Fixed price: Set a specific fixed price for the gift regardless of its original price.
When the A/B test is enabled, you are able to set different discount types for each option.
Step 5: Advanced settings
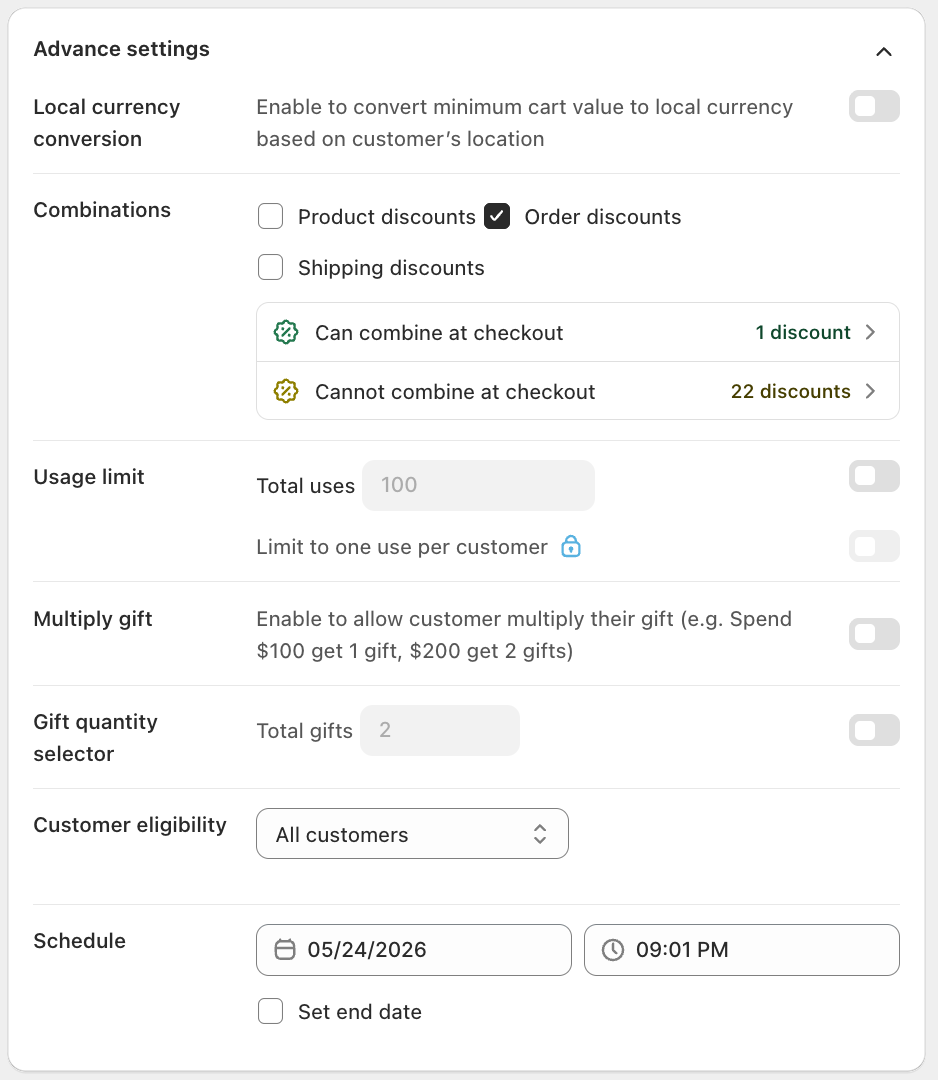
5.1 Local currency conversion
Enable this option to automatically convert the minimum cart value threshold to the customer's local currency based on their location. Before using this feature, make sure you have set up Markets in Shopify Admin > Settings > Markets.
5.2 Discount combination
You can let your customers combine this discount with other different types (from Shopify or other campaigns) to let them have the best deal based on their cart. Other discounts you can choose to combine are:
- Product discounts
- Order discounts
- Shipping discounts
5.3 Usage limit (optional)
- Total uses: To create urgency and push customers to act, consider enabling Total uses to limit how many times the gift is available overall.
- Limit to one use per customer: To avoid customers receiving too many gifts from a single discount, you can enable this to restrict each customer to one redemption.
The app will detect and enforce the one-time use per customer if the customer is logged into their member account. If the customer checks out as a guest, this restriction may not apply.
5.4 Multiply gift (optional)
Enable this option to let customers earn an additional gift for each multiple of the threshold spent.
- For example: If the threshold is $100, a customer who spends $200 gets 2 gifts, $300 gets 3 gifts, and so on.
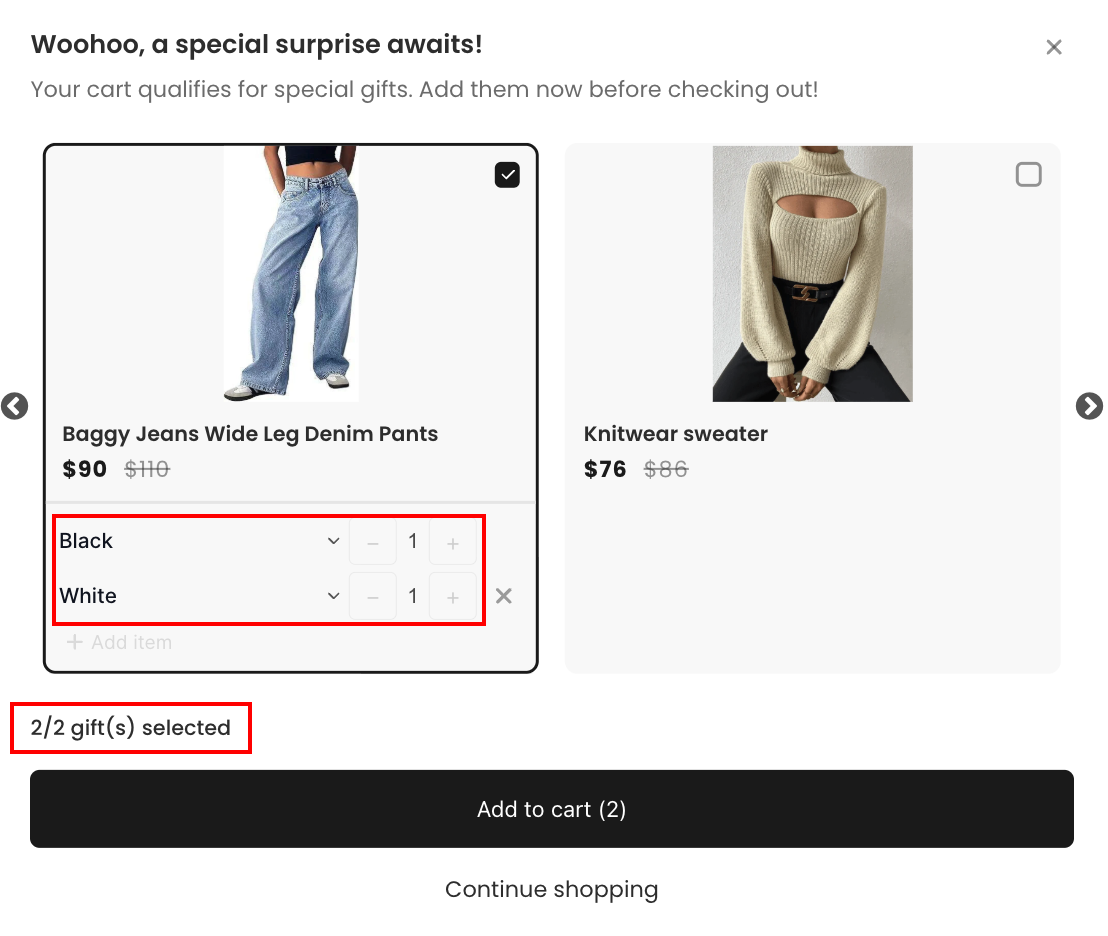
5.5 Gift quantity selector (optional)
Set the maximum total number of gifts a customer can receive. When enabled, enter the value in the Total gifts field.
With this feature, customers can select the same gift product multiple times up to the limit you set, and they can choose different variants for each selection, for example, selecting 1 Black and 1 White of the same item.
5.6 Customer eligibility
This section lets you control who can see and redeem this campaign. You can choose to make the promotion available to everyone or limit it to specific groups.
- All customers: The campaign will apply to anyone who meets the conditions, no restrictions.
- Specific link: Only customers who click on a unique campaign link will see or access the promotion.
- Customer location: Limit the campaign to customers from specific countries or regions.
- Specific customer segment: Choose specific customer segments to exclude from this promotion.
The app uses existing segments from your Shopify admin. If you need to filter a custom segment, please create one in Customers > Segments in your Shopify admin.
5.7 Schedule
Set when your campaign is active. The campaign will only be shown to customers within the defined time window.
- Start date: Select the date and time when the campaign begins.
- End date (optional): Enable Set end date and pick a date and time to automatically stop the campaign.
Step 6: Set up appearance
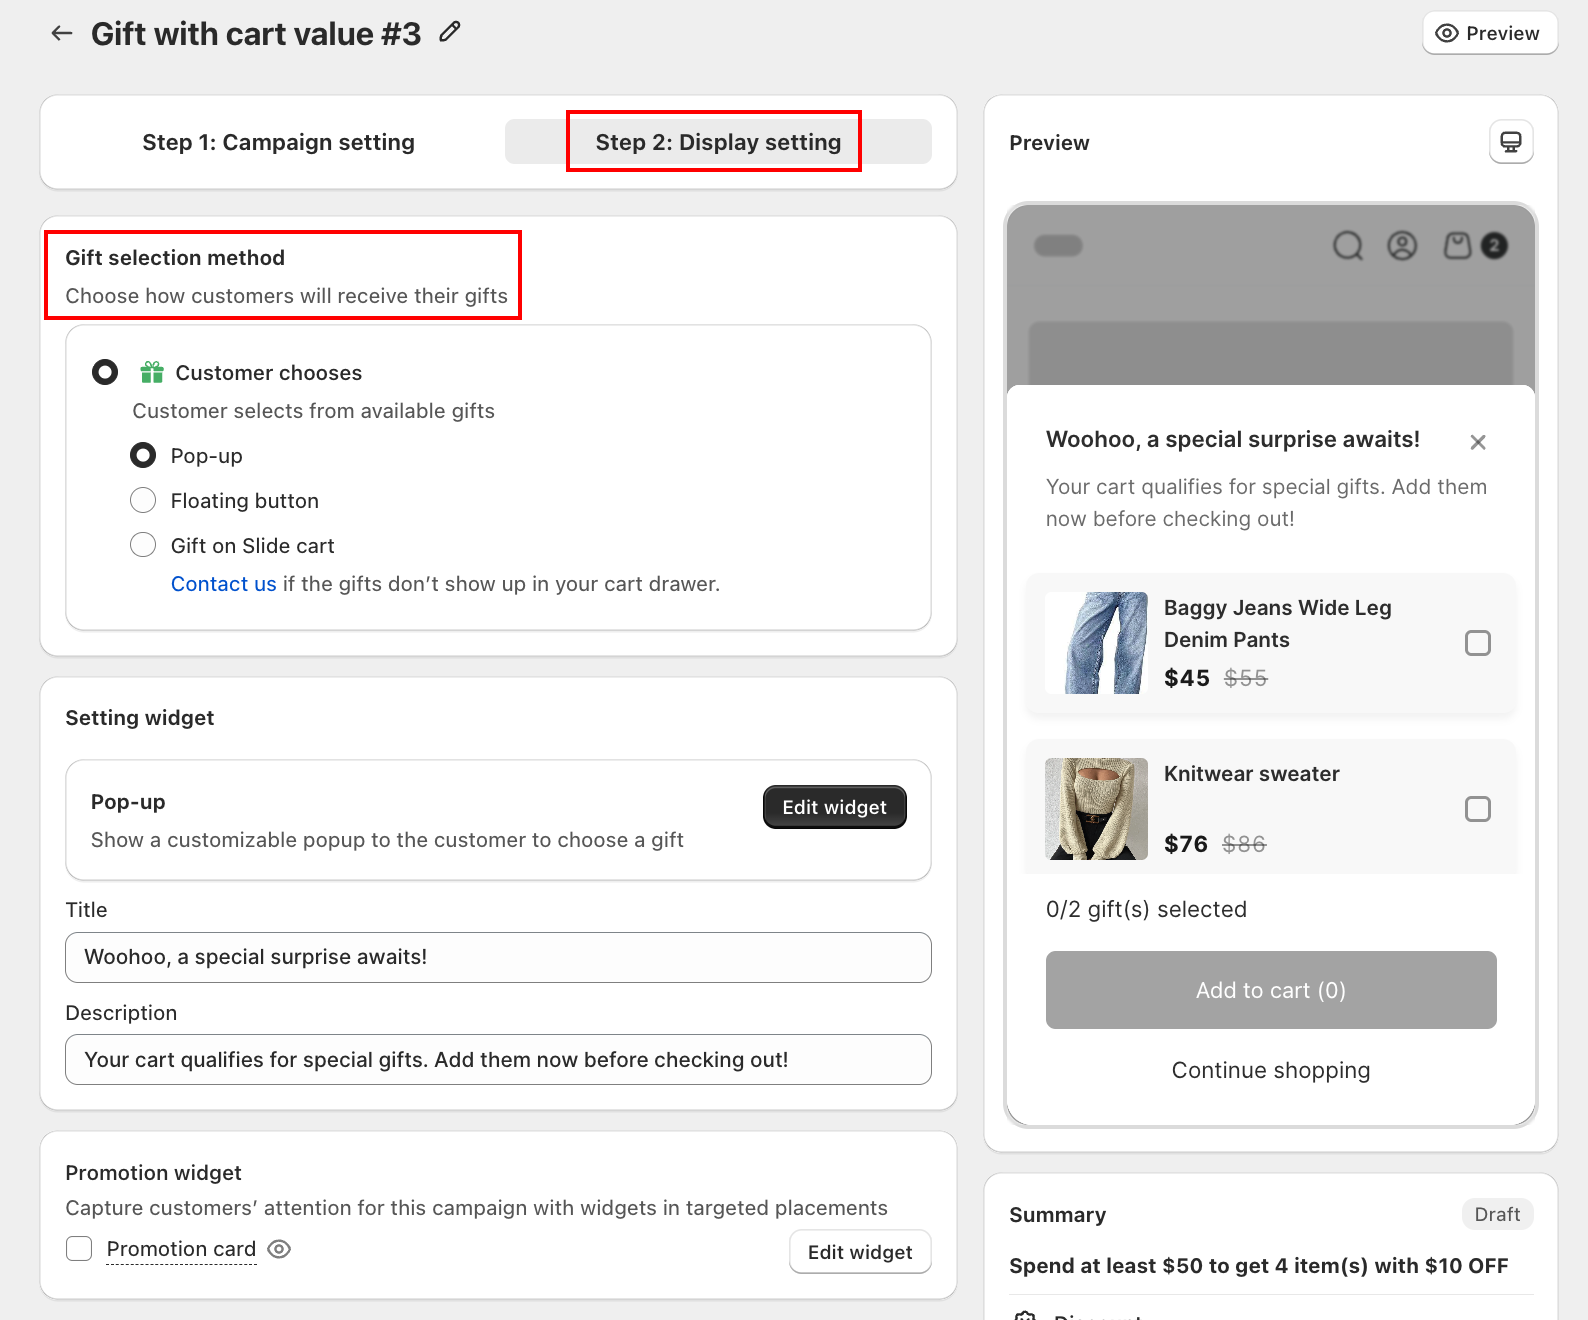
6.1 Gift selection method
Choose how customers will receive their gifts. Gift With Cart Value supports the following methods under Customer chooses:
- Pop-up: A pop-up appears for the customer to select their gift.
- Floating button: A floating button appears on the page. Customer clicks it to open and choose from the gift list.
- Gift on Slide cart (cart drawer): Customer picks the gift directly inside the cart drawer.
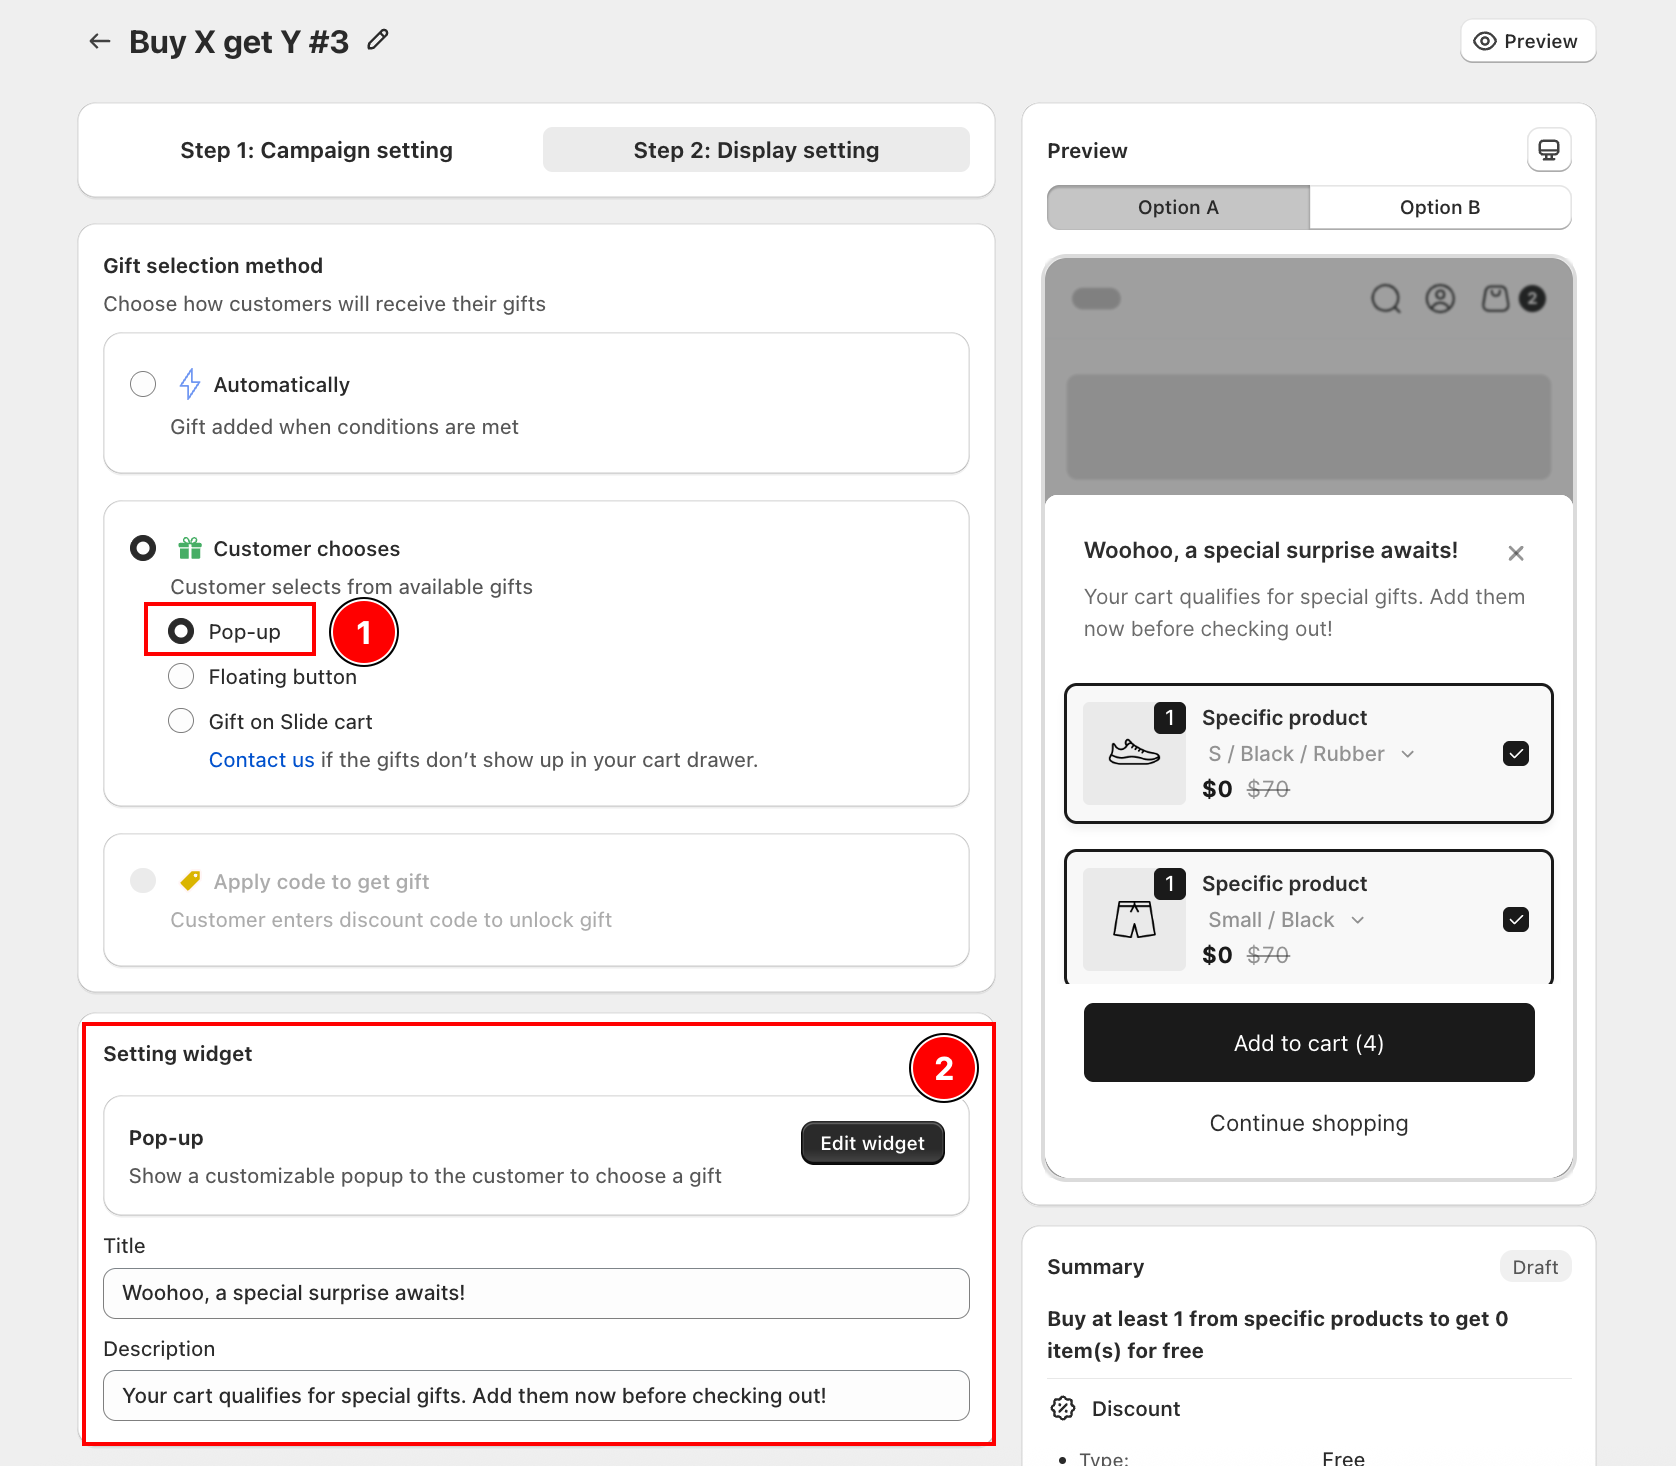
6.2 Setting widget
The Setting widget section updates automatically based on the gift selection method you choose in 6.1. Each method exposes its own set of text fields you can customize.
Customer chooses, Pop-up
When Pop-up is selected, the Setting widget shows the Pop-up configuration.
- Title: The headline of the pop-up (e.g., "Woohoo, a special surprise awaits!")
- Description: The body text shown below the title (e.g., "Your cart qualifies for special gifts. Add them now before checking out!")
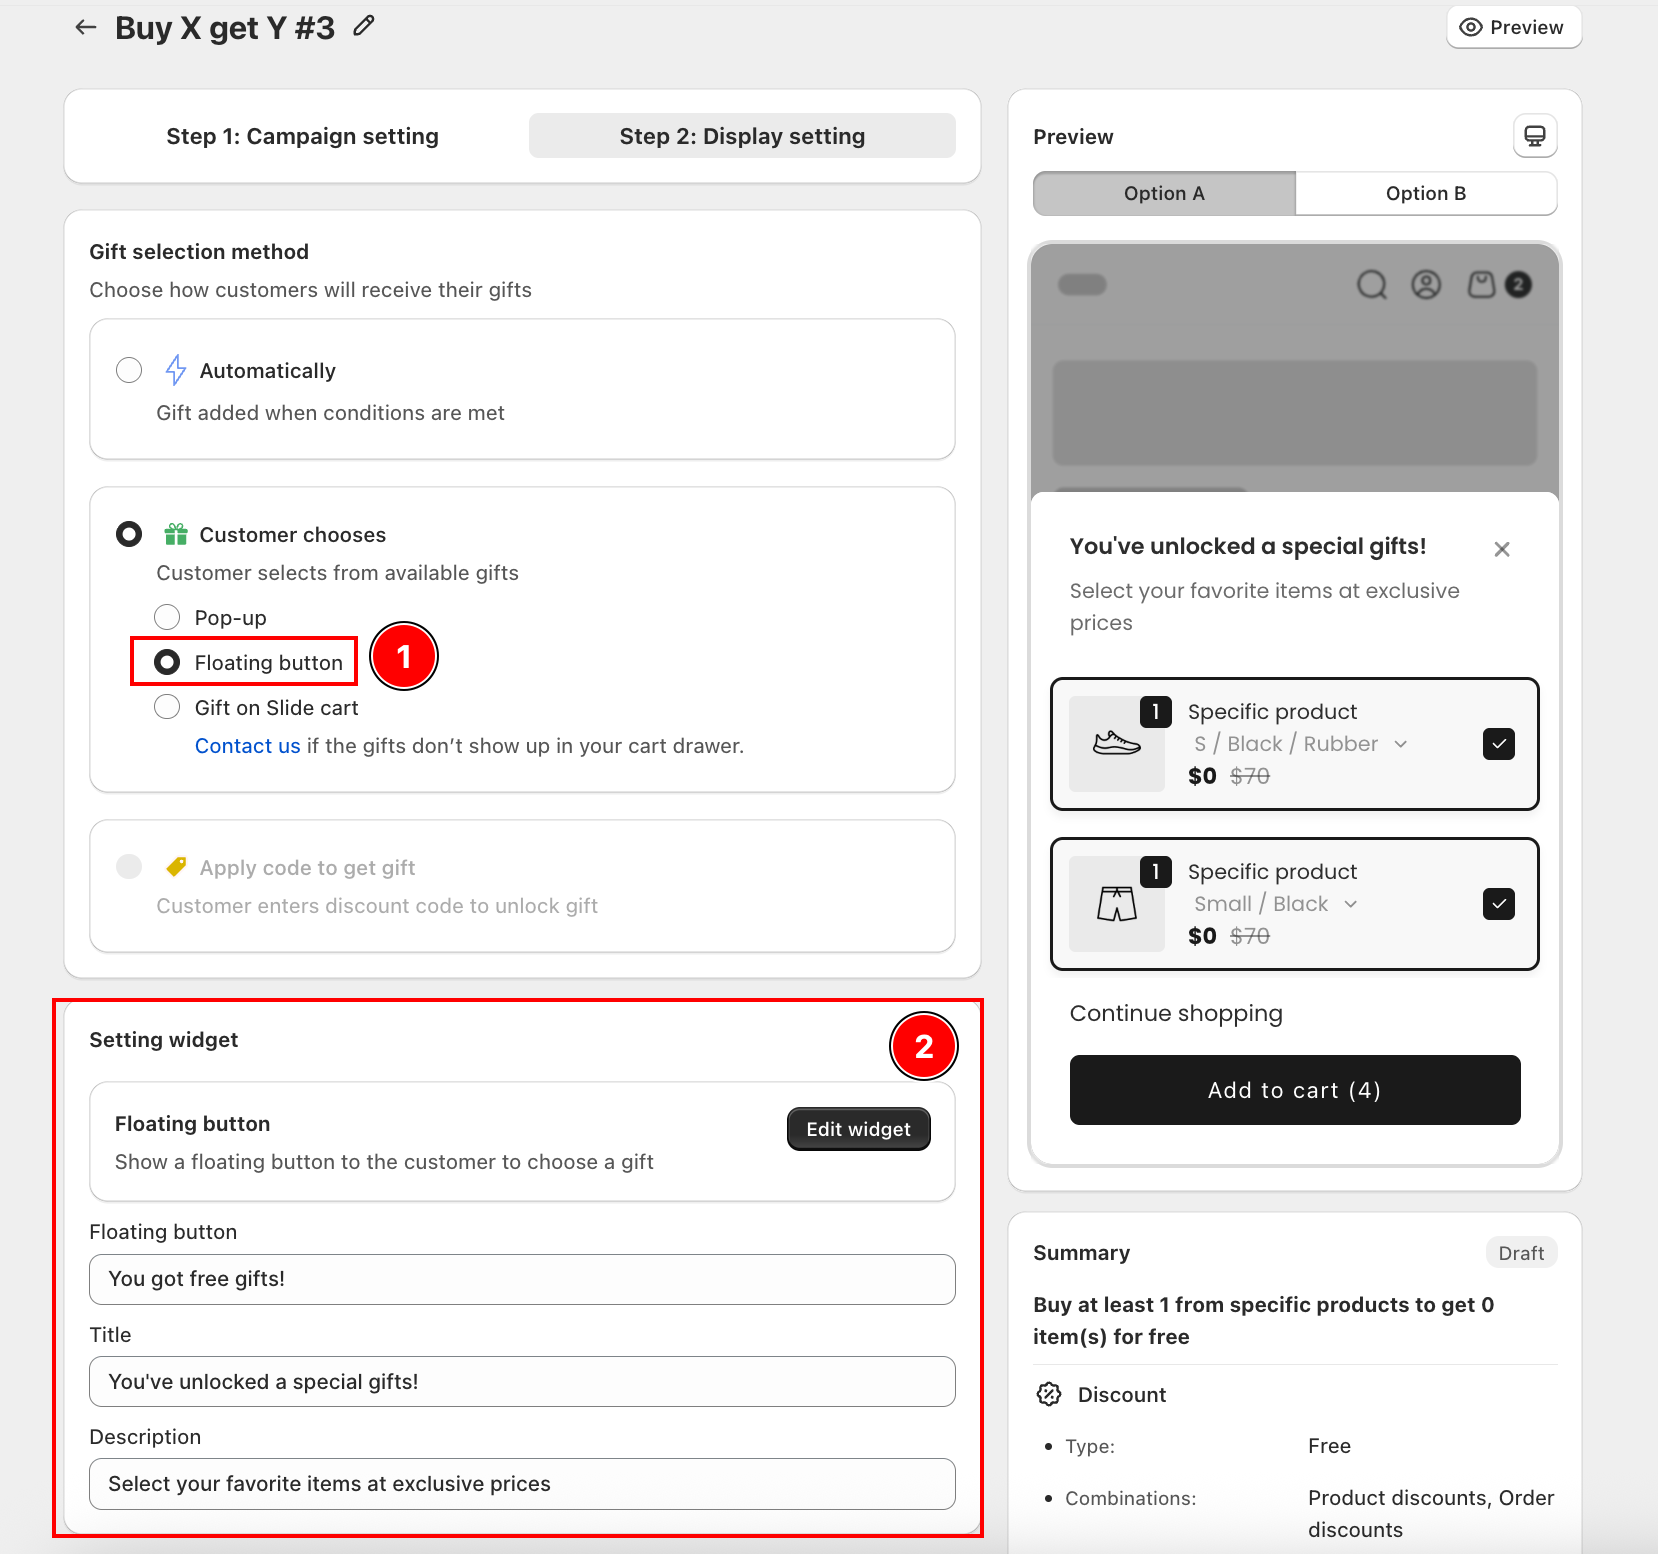
Customer chooses, Floating button
When Floating button is selected, the Setting widget shows the Floating button configuration.
- Floating button: The label displayed on the floating button (e.g., "You got free gifts!")
- Title: The headline shown inside the gift selection panel (e.g., "You've unlocked a special gift!")
- Description: The supporting text inside the panel (e.g., "Select your favorite items at exclusive prices")
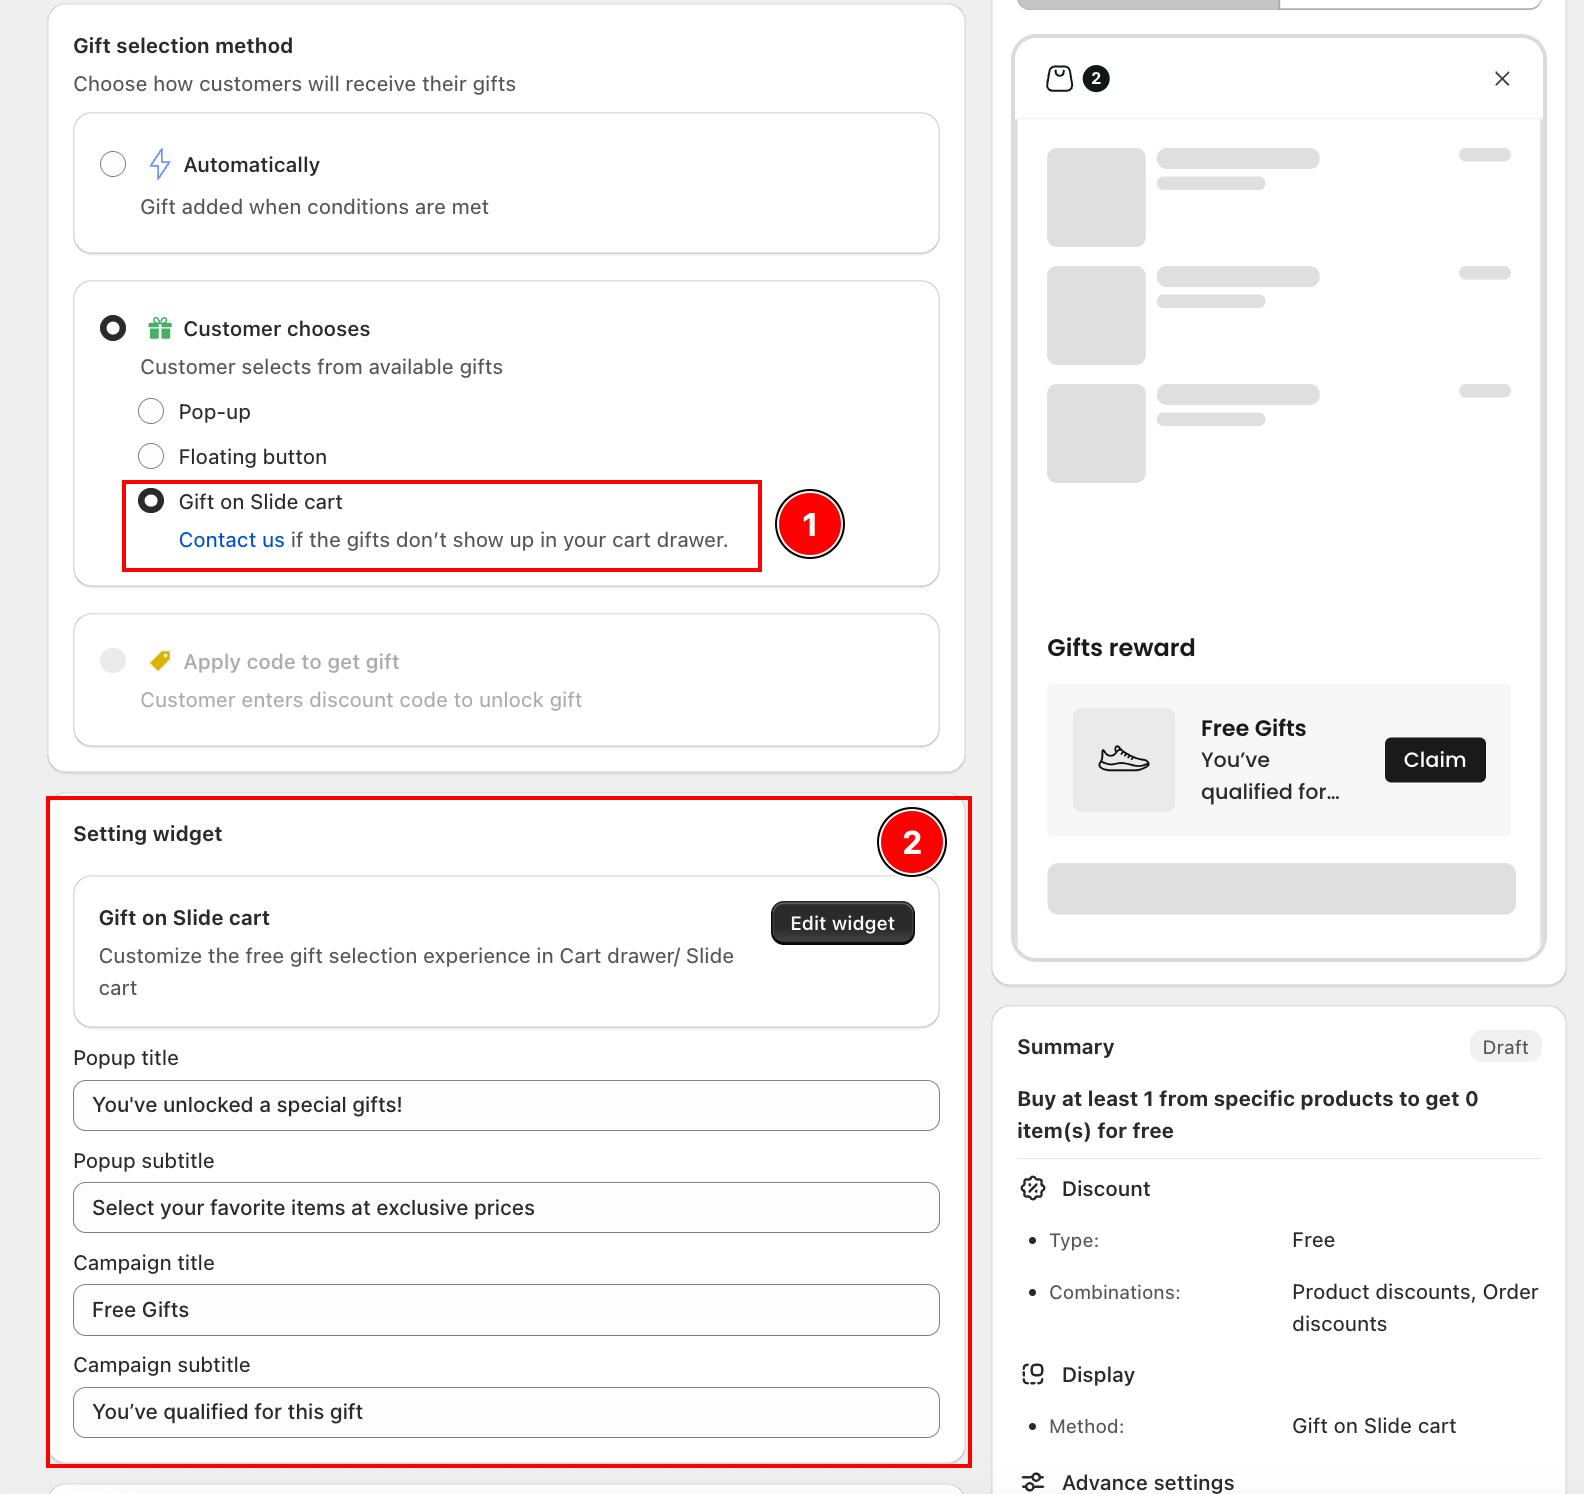
Customer chooses, Gift on Slide cart
When Gift on Slide cart is selected, the Setting widget shows the Gift on Slide cart configuration with fields for both the pop-up overlay and the in-cart campaign label.
- Popup title: The headline of the gift selection pop-up (e.g., "You've unlocked a special gift!")
- Popup subtitle: The supporting text below the title (e.g., "Select your favorite items at exclusive prices")
- Campaign title: The label shown on the gift reward inside the cart drawer (e.g., "Free Gifts")
- Campaign subtitle: The secondary label below the campaign title (e.g., "You've qualified for this gift")
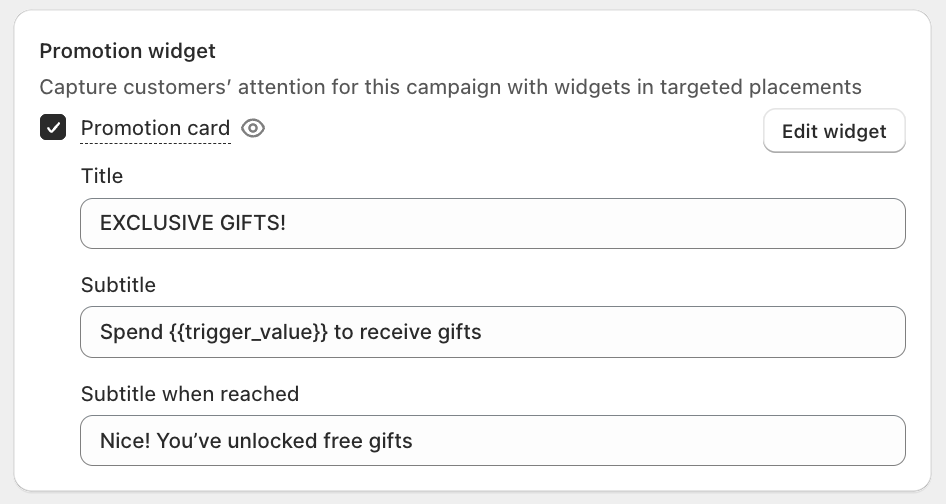
6.3 Promotion widget
Set up the promotion widget to capture customers' attention directly on the product page.
Promotion card is available for Gift with Cart Value campaigns. You can customize:
- Title: The headline of the promotion card (e.g., "EXCLUSIVE GIFTS!")
- Subtitle: The message shown before the threshold is reached. Supports the
{{trigger_value}}variable which auto-fills the minimum cart value (e.g., "Spend{{trigger_value}}to receive gifts") - Subtitle when reached: The message shown once the customer qualifies for the gift (e.g., "Nice! You've unlocked free gifts")
Final step
Once you've completed all the setup steps, take a moment to review your campaign settings to make sure everything looks correct.
Then, click Save to finalize your campaign.
To make it visible on your storefront, go to Online Store > Theme > Customize > App Embeds and enable the AOV.ai Free Gift app.
Need help!!
- Live chat support: Get real-time help directly inside the app. Click the chat icon in the bottom-right corner of your dashboard. Our support is on standby 24/7, feel free to reach out to us whenever you want.
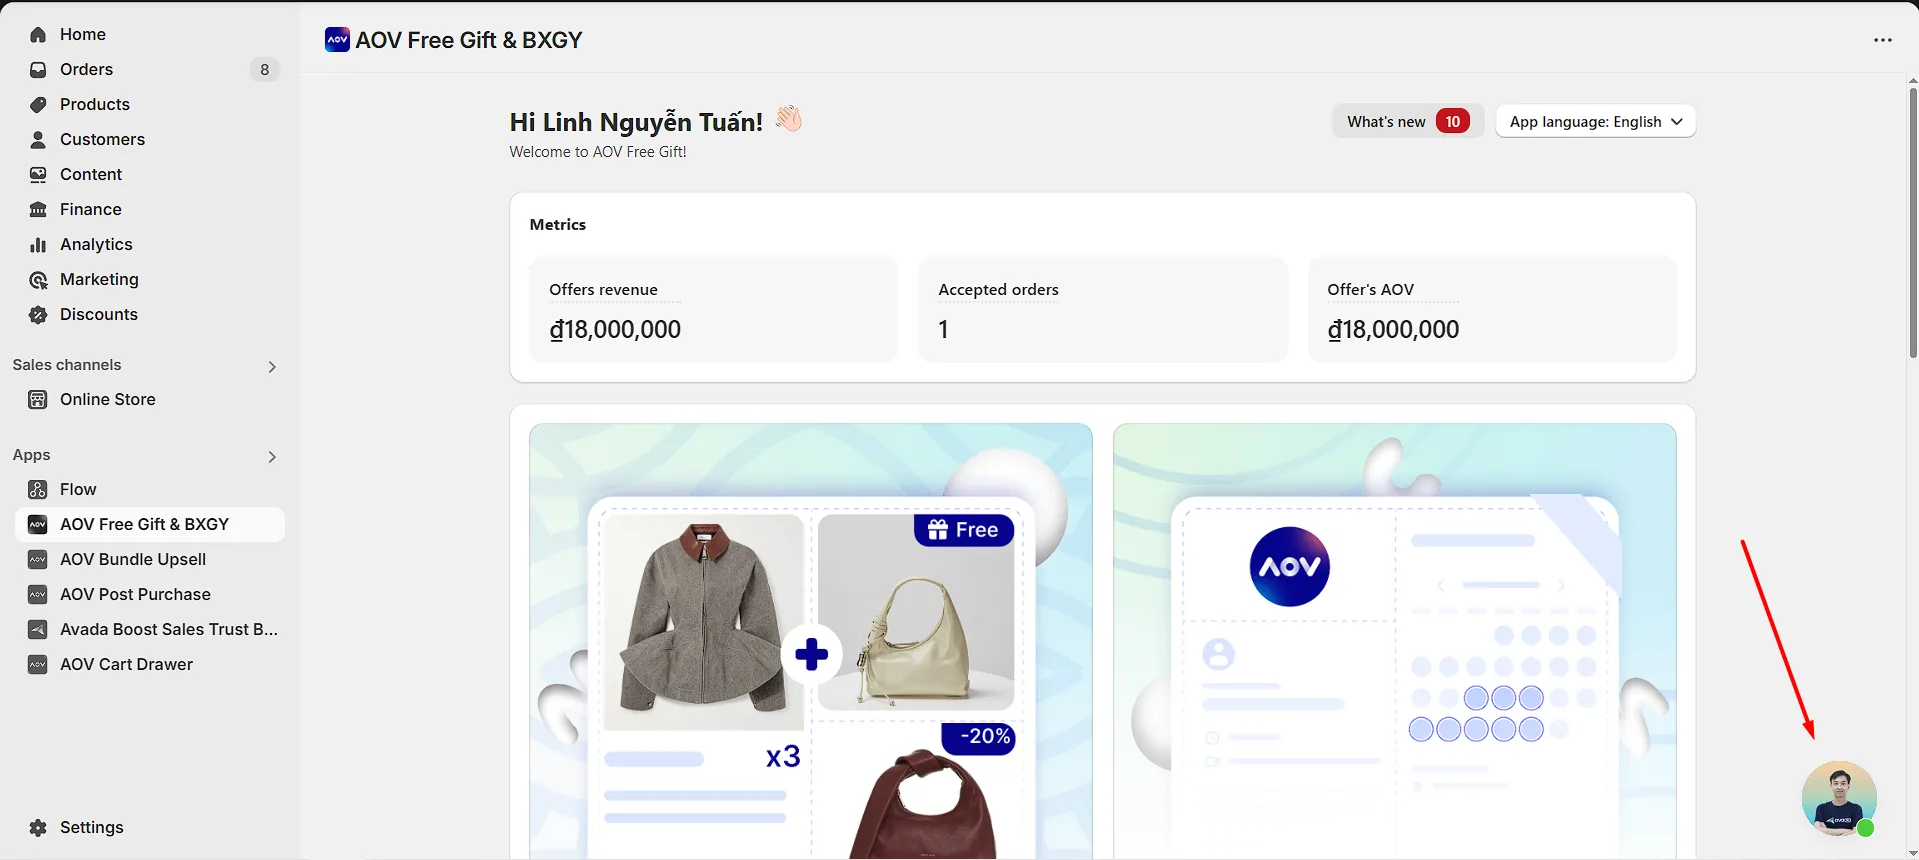
Live chat support in app
- Email us: For in-depth questions or technical issues, email us at: Support@avadagroup.com Response time: within 24 hours on business days.
- Watch the Setup Demo: Prefer a walkthrough? Watch our step-by-step video here: